Installing Ubuntu 20.04 on raspberry pi for Tensorflow

Why Ubuntu - 32 bit/ 64 bit ?
Out of plenty of operating systems available for raspberry pi, we need stable one’s intended to run ml projects (tf-lite, opencv). Raspberry Pi group’s debian based raspbian os provide good support and stable, but it is 32 bit. There is a 64 bit version out but in beta stage. We need a 64 bit OS for increased performance. Ubuntu provides OS in 64 bit version for rpi. It’s good to go.
Headless installation
If you don’t have separate monitor, (or) keyboard, (or) mouse for the regular installation you can choose this process.
- Download the Ubuntu Server Image from the official site: link
- Download balena etcher and flash the image to the SD card.
- After flashing is done, open boot folder from the sd card and edit
network-configfile to connect wifi.
Uncomment the lines below and change according your network.
wifis:
  wlan0:
  dhcp4: true
  optional: true
  access-points:
    <wifi network name>:
      password: "<wifi password>"
Save the file and remove sd card and place it in raspberry pi. After first boot wait for 20 sec and restart the machine.
Check for rpi’s ip address using wifi portal or fing app in mobile phone and ssh into the machine using the ip address.
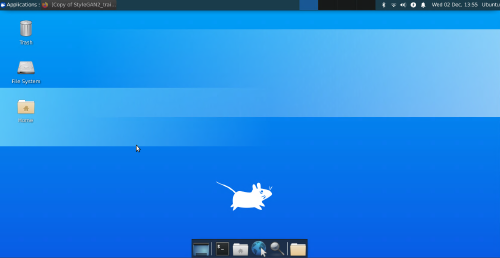
Desktop flavour install
We installed the server, next step is to install desktop environment. There are flavours in ubuntu for DE. As we have less computational resources, choose a lightweight flavour like xubuntu/lubuntu.
I used this awesome script to install desktop environment.
git clone https://github.com/wimpysworld/desktopify.gitcd desktopifysudo ./desktopify --de xubuntu
Finally install xrdp server to access the gui remotely. (xrdp »> vnc)
sudo apt-get install xrdp
you can connect remotely using remmina by ip-address

overclocking
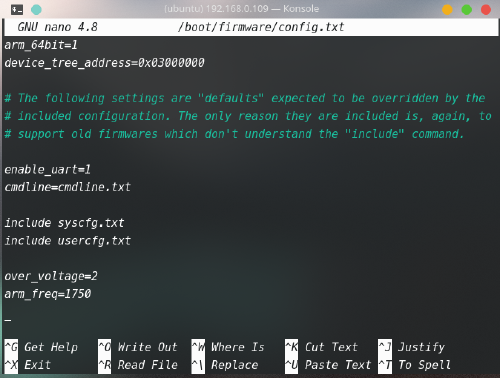
Add these below lines at end of /boot/config.txt
sudo nano /boot/config.txt
over_voltage = 2
arm_freq = 1750
then reboot : - )

To check clock speed use this command:
`lscpu | grep MHz.`
memory swapping
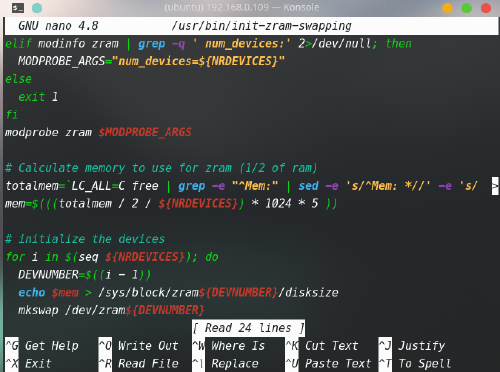
sudo apt-get install zram-configsudo nano /usr/bin/init-zram-swapping
Add a multiplier (* 5) at the end of the mem…. line. This gives you about 4.5 Gbyte of memory swap ( like this 1024 * 5)

reboot : - )
tensorflow install
-
Build tensorflow using the pre-built binaries from this repo: https://github.com/PINTO0309/Tensorflow-bin
-
Build tensorflow-lite using the pre-built binaries from this repo: https://github.com/PINTO0309/TensorflowLite-bin
opencv install
Option 1
directly installing from ppa repo:
sudo apt-get updatesudo apt-get upgradesudo apt install libopencv-dev python3-opencv
you can verify the installation by following command:
python3 -c "import cv2; print(cv2.__version__)"
Option 2 - directly from source
Before moving forward remember to set swap space(> 3gb), it is essential for build process.
Install these following dependencies
sudo apt-get updatesudo apt-get upgradesudo apt-get install build-essential cmake gcc g++ git unzip pkg-configsudo apt-get install libjpeg-dev libpng-dev libtiff-devsudo apt-get install libavcodec-dev libavformat-dev libswscale-devsudo apt-get install libgtk2.0-dev libcanberra-gtk*sudo apt-get install libxvidcore-dev libx264-devsudo apt-get install python3-dev python3-numpy python3-pipsudo apt-get install libtbb2 libtbb-dev libdc1394-22-devsudo apt-get install libv4l-dev v4l-utilssudo apt-get install libopenblas-dev libatlas-base-dev libblas-devsudo apt-get install liblapack-dev gfortran libhdf5-devsudo apt-get install libprotobuf-dev libgoogle-glog-dev libgflags-devsudo apt-get install protobuf-compiler
Next, download and unzip the packages
cd ~wget -O opencv.zip https://github.com/opencv/opencv/archive/4.4.0.zipwget -O opencv_contrib.zip https://github.com/opencv/opencv_contrib/archive/4.4.0.zipunzip opencv.zipunzip opencv_contrib.zip#rename the foldersmv opencv-4.4.0 opencvmv opencv_contrib-4.4.0 opencv_contribcd opencvmkdir buildcd build
Build make
$ cmake -D CMAKE_BUILD_TYPE=RELEASE \
	  -D CMAKE_INSTALL_PREFIX=/usr/local \
	  -D OPENCV_EXTRA_MODULES_PATH=~/opencv_contrib/modules \
	  -D ENABLE_NEON=ON \
	  -D BUILD_TIFF=ON \
      -D WITH_FFMPEG=ON \
	  -D WITH_GSTREAMER=ON \
	  -D WITH_TBB=ON \
      -D BUILD_TBB=ON \
      -D BUILD_TESTS=OFF \
      -D WITH_EIGEN=OFF \
      -D WITH_V4L=ON \
      -D WITH_LIBV4L=ON \
      -D WITH_VTK=OFF \
      -D OPENCV_ENABLE_NONFREE=ON \
      -D INSTALL_C_EXAMPLES=OFF \
      -D INSTALL_PYTHON_EXAMPLES=OFF \
      -D BUILD_NEW_PYTHON_SUPPORT=ON \
      -D BUILD_opencv_python3=TRUE \
      -D OPENCV_GENERATE_PKGCONFIG=ON \
      -D BUILD_EXAMPLES=OFF ..
build with these commands
make -j4sudo make installsudo ldconfigsudo apt-get update
Verify installation
pkg-config --modversion opencv4python3 -c "import cv2; print(cv2.__version__)"
